

How To Create An Animated Gif In Photoshop
If yous are a blog reader, you must take heard the adage or phrase "a picture is worth a thousand words". If that's true, it won't be incorrect to say a GIF is worth ten grand words. Why? Considering a GIF is a sequence of images and provides more information than a single still image.
Forth with providing detailed information, it besides adds an appeal to a lifeless epitome. GIF or graphic interchange format is an immensely pop prototype format nowadays in the online world. People are deploying this mind-bravado prototype format both commercially and non-commercially.
How to Make a GIF from an Paradigm Sequence in Photoshop
No thing whether you lot want to bring life to your lifeless abstract image or make people chuckle, you can become for GIF. The overnice thing nigh GIF is that you can brand blithe GIFs in Photoshop in a simpler mode. You don't have to be an expert to create it. All you lot need is to have admission to Photoshop. With a few unproblematic steps, you tin can make information technology washed.
And then, let's get started and take a look at how you can plough an epitome sequence into an animated GIF in Photoshop. (A Step-by-Step Tutorial)
1. Open your Photoshop Window
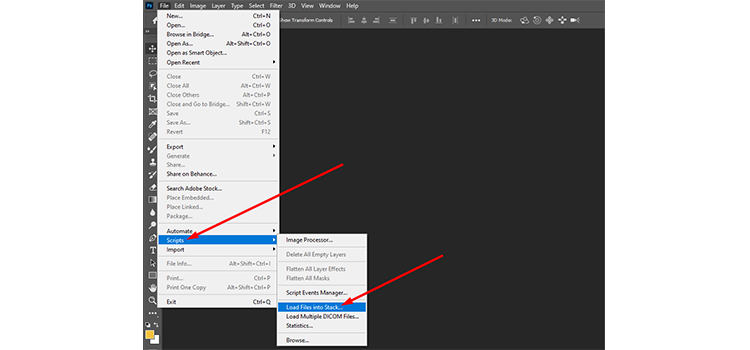
At kickoff, open Photoshop and go to the File tab from the carte du jour bar. And so, click "Scripts" from the list of items and select "Load Files into Stack" from the side menu. This volition open up a window from which you lot take to browse your epitome sequence to create an animated GIF.
File > Scripts > Load Files into Stack
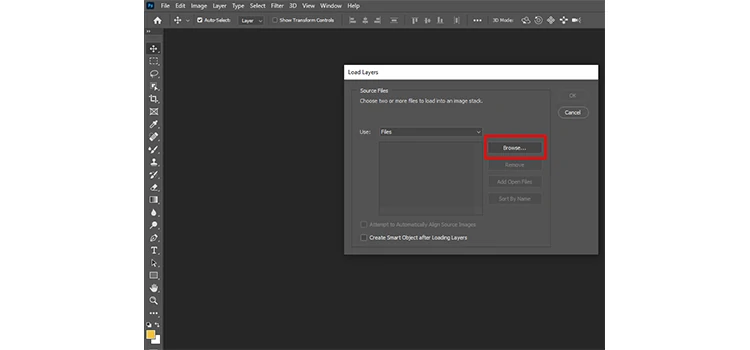
ii. Select your Images Sequentially

Now, source and select your images sequentially that y'all stored in your computer storage to make a GIF. Be watchful to maintain the sequence of your images as any error in the order volition goof upward your final GIF.
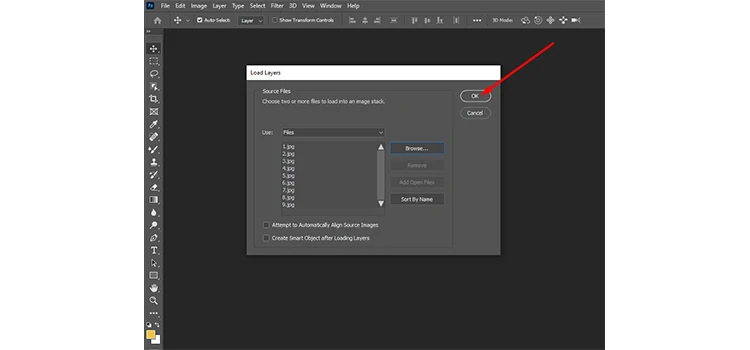
Once you select your series of images, they will evidence up list-wise as displayed in the 2nd screenshot below. Just striking the Ok button from there to move forrard.
3. Open the Timeline Panel

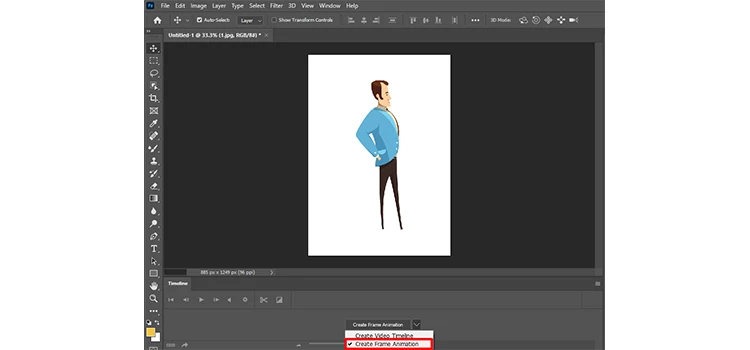
Now, go to the Window tab in the menu bar and select Timeline from the drib-downward menu. At present, you lot can view the timeline panel below your Photoshop canvass along with the anest image of your image sequence. Select "Create Frame Blitheness" from the drop-downward in the Timeline console.
4. Create New Layer for Each New Frame

After that, click the carte icon as shown on the correct side of the timeline window and select "Create New Layer for Each New Frame" from the list of items.
five. Select All the Layers

At present go to the carte bar again and click the "Select" tab followed past All Layers particular. Y'all can select All Layers item using the keyboard shortcut Alt + Ctrl + A as well.
6. Convert Layers into an Blitheness Frame

Adjacent, click the bill of fare icon from the timeline window again and select "Make Frames from Layers" as showcased in the screenshot beneath.
7. Export and Relieve the Frames
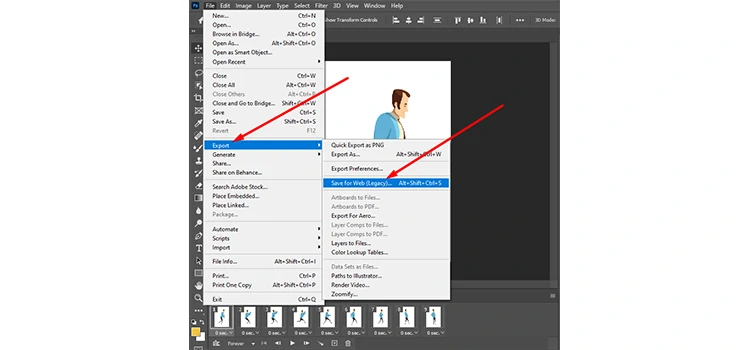
You are near washed with your try of creating animated GIFs from an prototype sequence in Photoshop. But before that, you have to save the frames. For that, go to File, click Export from the drib-down carte, and so "Salvage for Web (Legacy)" in order to consign the animation.
File > Export > Save for Web (Legacy)
eight. Save as GIF

This will bear witness a new window from where you have to save your newly created GIF. Select GIF 128 Dithered from the driblet-downward menu showing upwards in the Preset section. Then, save your GIF straightaway hitting the Save button.
nine. Proper noun and Save your GIF
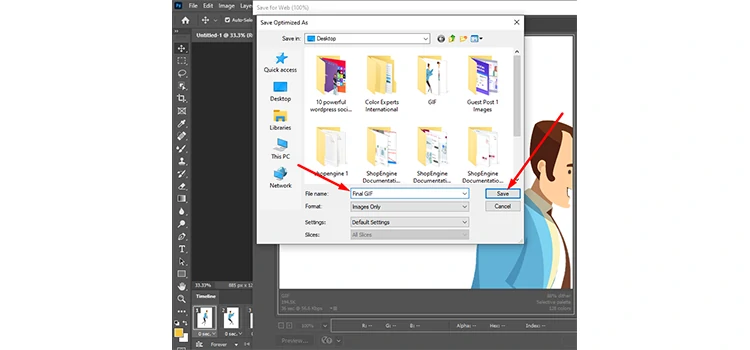
This will popular up a dialog box where yous take to name your GIF file. We take named our GIF file as "Final GIF" as visible in the screenshot below. Finally, save your GIF in any location you adopt.
Final Output
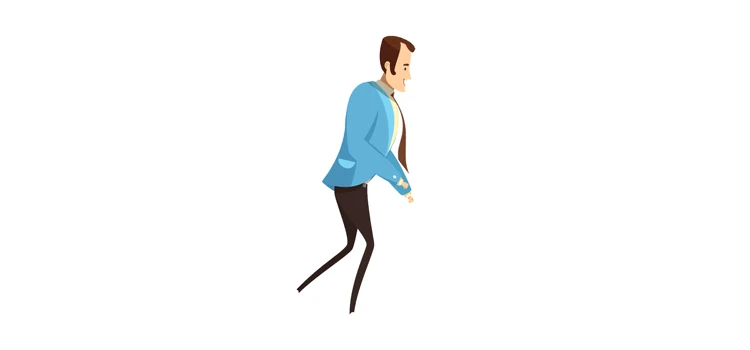
Finally, the GIF is created from an image sequence. You lot tin can see the continuous running of the character below. This is how can create movement in any sequence of still images and bring life to the epitome sequence.
You may too read– How to Modify Background Color in Photoshop.
To Conclude
That'southward it!!! This is how you can create a GIF simply and smoothly from an prototype sequence in Photoshop. Whether your images contain abstract elements or characters, you tin animate them hands and convert them into a GIF. The beauty of a GIF is it tin be created for fun and at the aforementioned time, you lot tin can create meaningful GIFs by adding contexts.
Hope you guys accept enjoyed the tutorial and learned how to create an blithe GIF in Photoshop but. Until next time, only chill and bask!!!
Source: https://www.colorexpertsbd.com/blog/how-to-make-an-animated-gif-in-photoshop/
Posted by: austintaidow72.blogspot.com
0 Response to "How To Create An Animated Gif In Photoshop"
Post a Comment